

How To Draw An Image Im Illustrator
Practice you desire to larn how to describe in Illustrator? In this tutorial, I'll bear witness you how to depict a vector illustration step by step, proving to yous that Illustrator is not equally scary as it may seem. It may not exist equally intuitive to utilise equally raster drawing apps, but if you don't accept a graphics tablet, yous'll love how precise you tin exist with these tools!
If you need custom Illustrator brushes, check out Envato Elements. One subscription gives y'all access to millions of creative assets, so you're guaranteed to find something for your analogy needs!
Would you like to learn how to describe in Adobe Illustrator by watching a video tutorial? Then y'all'll like this new video from the Envato Tuts+ YouTube channel:
What You'll Acquire in This Illustrator Basic Drawing Tutorial
- How to draw in Adobe Illustrator
- How to draw line art with Illustrator
- How to create a simple drawing using Illustrator
- How to color line fine art in Illustrator
- How to shade in Illustrator
ane. How to Set up the Sketch
Footstep 1
Let'due south go started then! Create a New Document. In Illustrator, the resolution is not that important—you lot tin always change it later on without any loss.


Step 2
Now, go to the upper right corner and set the Workspace to Painting. This will requite you better admission to all the tools you need in your illustration work.


Step 3
Although it's possible to sketch in Illustrator, information technology would exist counter-productive, since in that location are other programs meliorate equipped for this task. So create your sketch in a split up programme, or fifty-fifty traditionally, and paste it onto the canvass. You can as well download my sketch.


Footstep four
Have the Pick Tool (V) and catch 1 of the corners of the image. Hold both the Shift and Alt keys, and elevate until yous fill the whole sail with your sketch.


Step 5
Double click on Layer one and check Template. Set Dim Images to 20%. We want this sketch to be visible, but not distracting.


Pace 6
The sketch is now locked and so that you don't draw on it by accident. Create a New Layer past clicking the plus icon at the bottom of the Layers panel.


2. How to Describe Line Fine art in Illustrator
Side by side in this Illustrator basic drawing tutorial, let's look at line fine art. In that location are at least 4 ways of cartoon lines in Illustrator—you should choose the one that works the all-time for the task at paw.
1. The Paintbrush Tool (B)
Showtime, you can just employ the Paintbrush Tool (B). Press D to reset the swatches, and then depict a few test lines. You tin alter the size of the castor by holding the square bracket keys: [ and ]. Some brushes, all the same, tin only be resized past selecting the Stroke Weight in the upper bar.


You lot can change the style of the brush past clicking the presets in the Brushes panel. There aren't many Illustrator brushes in there by default, but yous tin open the menu in the upper right corner and select Open up Brush Library. If y'all select any of the sets, it will open up as a new window. You tin keep all your sets in ane window, or in separate windows for easier access.


If you double-click the Paintbrush icon in the toolbar, yous'll get access to a couple of useful settings. First, if you experience your lines are also shaky, you can tell Illustrator to smooth them out for you by dragging the Fidelity slider to the right.


If the opposite is the case—if yous feel the lines are not as precise as y'all would similar—drag the slider to the left.


If you lot bank check both Keep Selected and Edit Selected Paths, you'll be able to edit the recently fatigued line just by drawing over information technology. And if you want to alter any older line, just select information technology with the Selection Tool (V) and y'all'll be able to change information technology the aforementioned way. However, if y'all want to draw a lot of lines side by side to each other, it's ameliorate to leave the Go on Selected option unchecked.


If y'all have a graphics tablet with pressure level sensitivity, you tin also use it in your drawing. Just double-click the brush on the list, set up the Size to Force per unit area, and increase the Variation. This volition requite y'all that familiar tapered line effect.


You may notice that various Illustrator brushes have diverse settings in one case you lot double-click them. This is because Illustrator has five types of brushes. If you want to learn more than about these types, check out this tutorial:
If you lot want to merely draw lines, without worrying about the brush backdrop, y'all can also use the Pencil Tool (N).


2. The Pen Tool (P)
The paintbrush method is slap-up for cartoon if yous have a graphics tablet. However, if y'all have a mouse, you may need a more precise method. The 2d method is the Pen Tool (P). With this tool, y'all tin can describe your lines segment by segment, turning these segments into curves past clicking and dragging. We call such lines paths.


Information technology may look complicated at outset, but just take a close look at what happens hither. When you're dragging the anchor point—the stop of the segment—ii handles appear. When yous drag ane handle, the contrary ane moves as well. That contrary handle pulls the line to itself like a magnet. And then you can create whatsoever curve y'all want by moving that handle in a chosen direction.


In one case you lot release that anchor, the new segment will be automatically pulled to the handle you were dragging before. This ensures a smoothen transition between both segments.


Only if you don't like it, and you'd rather draw the new bend manually, concur the Alt key and click the previous anchor. This will remove that second handle and will allow you to describe a new segment on your ain.


If you desire to stop drawing the line, press Escape. To deselect the line, click the canvas with the Selection Tool (Five), or apply the shortcut Command-Shift-A. If you lot want to go on drawing after that, just click the last ballast indicate with the Pen Tool.
You can also modify the line after it's been drawn. Y'all can remove the ballast points by clicking them, or add together new anchor points by clicking on the segments.


If you hold the Control primal, yous can select the ballast points to move them or to elevate their handles.


You can too concord the Alt primal and conform the shape of the curves directly by dragging them.


If you click an ballast point between two segments with the Alt key, y'all'll remove its handles—and by dragging, you tin can create them from scratch.


Alternatively, you lot can apply the Directly Choice Tool (A) to drag the points around without having to hold any keys.


At present, let me show y'all a absurd thing. If you lot draw a line with the Paintbrush Tool, and so select it with the Pick Tool (V) and selection the Pen Tool, you'll detect it'southward made of anchor points too—and it tin can exist modified the same style! So fifty-fifty if yous have a graphics tablet and you prefer to draw with the Paintbrush, understanding the Pen Tool will give you more than command over the shape of your lines.


Because it's so easy to change the paths, hither'south a very simple trick to make drawing with the Pen Tool more efficient. Instead of dragging the curves, but click effectually the shape yous want to draw. Then add together the handles past holding the Alt key and dragging the points, or move them with the Control key, or add or remove the points.


iii. The Curvature Tool (Shift-~)
If you nevertheless discover the Pen Tool too complicated, Illustrator offers a simplified version of this tool—the Curvature Tool (Shift-~). The full general dominion is the same, simply it's much more intuitive to use—there are no handles, and the line just curves as yous change direction. And to alter its shape afterwards, you don't have to remember any shortcuts—just click and elevate. The cool thing is, you tin change whatever path with this tool—no matter what tool you used to draw it!


iv. The Ellipse Tool (L)
The terminal method is useful especially for outlining big, smoothen shapes. Instead of drawing the lines, draw an oval with the Ellipse Tool (L)—hold the Alt cardinal to have more command over its position. Resize it by dragging its sides to roughly fill the shape that you want to outline.


And so take the Pen Tool or the Curvature Tool and drag the outline to reshape it like a slice of clay. This method may exist less precise than the others, but this is the point—the lines drawn this way will seem smoother, simpler, and more deliberate.


Another useful trick is that you lot can create complex shapes out of elementary shapes. Just depict multiple shapes, select them, and describe over them with the Shape Builder Tool (Shift-M). This volition give yous a nice, complex shape without having to describe it by paw.


Erasing
Nosotros've been talking almost drawing lines for a while, so let's now talk well-nigh erasing. If the line doesn't make a airtight shape—its starting time and end are not connected to each other—then you can merely use the Eraser Tool (Shift-Due east) on a selected path.


If the line makes a closed shape, it's not so piece of cake—Illustrator applies the eraser to the shape, non to its outline. If y'all want to edit the outline, there are a couple of ways to practise information technology.


Starting time, you lot tin can turn the outline into a shape. Go to Object > Path > Outline Stroke. Now you can use the Eraser on it ordinarily, but the line is no longer a path, and you can't edit it like one.


The alternative is the Scissors Tool (C). You tin select the segment of the path that you want to remove by clicking on information technology twice. So printing Delete to remove it.


Yous can as well erase with the Shape Builder Tool (Shift-M)—if one shape intersects the other, you can remove the intersected role by drawing over them with this tool.


Sometimes you tin even make erasing automatic. For example, if you describe an middle, you may desire to draw the iris with an oval, but some part of the oval will state exterior of the eye. To avoid this, select the eye shape, go to the toolbar on the left, and click the tertiary icon from the bottom. Select Draw Inside. At present annihilation yous draw will be automatically cut to the selected area.


If, later doing this, the stroke of the heart disappeared for you, become to the Stroke settings and brand sure the Align Stroke to Heart choice is selected. Also, remember to go back to Draw Normal mode after you're done.


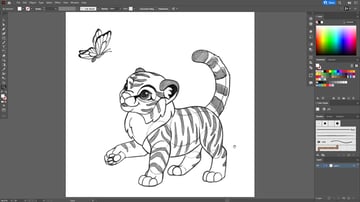
Draw the Line Art
At present that y'all know how to draw the lines, stop your line art. Use your favorite method of the ones I've merely presented, or use a mix of them, switching betwixt them depending on the task.
During the drawing, you may detect it useful to go into the Outline Manner—press Control-Y to come across the paths improve.


When cut or erasing a part of the shape, it's also good to split up the shape from the balance by double-clicking it. You lot can get back to the previous mode with the Escape key.


You may notice that drawing in Illustrator is more like edifice—it's more than precise, and because in vector art every line counts, you need to place them more deliberately. Drawing a lot of lines all over each other, like in raster art, would result in anarchy. It may experience limiting to you, but you need to remember that this is what this programme has been designed for—if y'all desire to create art with a mouse, this is the way to do it.


3. How to Ink Line Art in Illustrator
Let's talk about the visual side of the lines now. Every bit I've mentioned before, Illustrator doesn't care what tool you used to draw a line—they're all paths, and they all can exist edited the same style. So just as you can choose a brush preset to pigment with the Paintbrush, you tin apply any of the brush presets to the existing lines. Some of them will allow y'all to create a tapered line effect without using the graphics tablet.


If you used the Draw Within way before, you may detect that some of the castor presets don't piece of work for the Clipping Masks you've created this way. To fix it, select the grouping, go to Object > Clipping Mask > Release, and re-create the missing outline.


Undo, and paste the outline in front with Control-F.


You tin can also control the width of each line in a more than precise way. Commencement, you can select a width profile from the list—experiment with them to see which 1 looks best on your lines.


Second, you lot can use the Width Tool (Shift-West). This tool allows you to change the width of any signal of the line, separately from the anchor points. With this tool, you can create a piece of line art with nicely variable lines, using the mouse only. All the same, this method won't piece of work on the lines drawn while using pressure level sensitivity.


Step one
Finish your line fine art now, choosing the castor, the width of the lines, or their variable width profile. It's often good to brand the main outline thicker than the other lines. Spend some fourth dimension making sure that all the areas that are supposed to exist separated are actually outlined with closed shapes—this volition be of import during coloring. Accept your time and make your line art every bit clean and nice every bit possible.


Pace 2
When you're done, hibernate the sketch layer and go to Window > Pathfinder. Select your Clipping Masks and click Dissever. This will cut the parts hidden by the mask.


Step three
Select the whole drawing and go to Object > Path > Outline Stroke to plough the paths into shapes. You won't exist able to edit their properties anymore, but this volition make them more anticipated during the coloring process. Open the Pathfinder panel again and click Merge to remove the intersections.


4. How to Color in Illustrator
Pace 1
Let's go to coloring now! Proper noun your layer colors. Open the Layers carte and select Duplicate. Name the copy line fine art, lock it, and go back to the colors layer.


Stride 2
Allow'due south plan our colour palette before we first coloring. Click the Swatches panel and Add together a New Color Group.


Footstep 3
Now, expect at these 2 squares—the upper one defines Fill, and the lower i defines Stroke. So far, we've only been using black strokes without any fill, but if you want to add some color within the outlines, you lot can simply double-click the upper square and pick the color. Y'all can use the same method to modify the colour of the stroke.
If you want to remove the make full or stroke, just select the ruby-red-crossed swatch from the list.


Step 4
To add new color swatches, select the new colour on either Fill up or Stroke, then select the new group, and press the plus icon. Do this as many times as needed to prepare all the colors you want to employ in your artwork. Of class, this doesn't mean you won't be able to choose anything else later—it volition just give us something to kickoff with.


Pace 5
Now, printing G to access the Live Paint Bucket. This tool automatically detects the areas outlined by your line art, as if it were a coloring folio. You just have to tell it what colors to employ, and so remove the stroke and add together the chosen color to your fill. Then but click the area that y'all desire to make full.
You tin can easily load the bucket with a different swatch past using the left and correct arrow keys. Yous can also pick swatches from the other sets.


Step half dozen
That was easy, simply such flat colors wait a little boring. Let's add together some gradients to the mix. First, select the whole image and click Aggrandize in the upper bar. At present you tin easily select the individual areas of color with the Direct Selection Tool (A).


Step 7
Select the area that you lot desire to add the gradient to, and have the Gradient Tool (G). Option the mode of the gradient in the upper bar, and conform the direction of the gradient.


Footstep 8
Then, open up the Slope panel and use your own swatches to the slope.


Step 9
You tin can save the gradient as a new swatch, and then apply it to the other parts of the picture. You can hands adjust the orientation of the gradient by clicking and dragging with the Gradient Tool (Grand).


Footstep 10
Our tiger won't be complete without its stripes, though! Show the sketch layer again and press Command-Y to get into outline mode. Create a New Layer and name information technology stripes. Lock the color layers.


Step 11
Now utilize your chosen drawing method to depict the stripes. Feel free to go exterior the main outline of the torso—nosotros're going to prepare it in a minute.


Stride 12
When you lot're done, get out of Outline Way (Control-Y), hide the sketch, and colour your stripes. They may look better without a Stroke. So, select all the stripes and go to Object > Chemical compound Path > Make to turn them all into 1 shape.


Stride 13
Let'south clip the stripes to the body now. Unlock the colors layer, copy its content, and then lock it back. Get dorsum to the stripes layer, and paste in front with Command-F.


Step 14
Open the Pathfinder and click Merge, then Unite, and go to Object > Compound Path > Make.


Step 15
So, in one case the pick turns into 1 shape, select everything and go to Object > Clipping Mask > Brand.


Step 16
Because the stripes are now a single object, you can select them with the Direct Selection Tool (A) and apply a gradient to them. Information technology volition wait especially nice with some transparency.


Step 17
You lot tin easily make the stripes more interesting past copying them and pasting them at the back with Control-B, and so styling the copy a different way—for example, making it brighter and more transparent.


five. How to Shade in Illustrator
Step i
Let'south add some shading at present. Lock the stripes layer and create a New Layer. Name it shading. To quickly draw the shadows, y'all can use the Pencil Tool (North)—but make sure to check Fill up New Pencil Strokes in its settings.


Pace 2
Copy the Clipping Mask from the stripes layer just as we did before with the eyes—release information technology for a second, copy the outline, undo, and paste in front with Control-F. Set the mode to Describe Inside.


Pace 3
Start drawing the shadows. Draw the areas of shadows separately—this volition help u.s.a. adjust them individually later. Remember that you don't have to be precise—you can employ the colored areas in combination with the Pathfinder panel to cut that part from the shadow area. Nonetheless, using a graphics tablet may mean y'all don't need it at all.


Footstep iv
When you lot're done, select all the shadows and get to the Transparency panel. Change the Blend Mode to Multiply, and lower the Opacity to blend the shadows nicely with the body. Set the way back to Depict Normal.


Footstep v
To brand the shadows look fifty-fifty nicer, you lot tin use a gradient to them. Making ane side of the gradient transparent will help yous blend the border of the shadow—you but take to adjust the direction of the gradient to the position of the shadow.


Step vi
To make the body look even more 3D, we tin can use the same method to add some calorie-free on the top of the trunk. All the steps are the same—except this time you should use Overlay instead of Multiply.


Pace 7
To finish the shading, permit's just add a shadow on the ground. A radial gradient with transparent sides will await corking here.


Step viii
Y'all tin can likewise add some detail to the eye by filling the iris with a radial gradient and adding a white highlight on pinnacle.


Good Chore!
Now you know how to draw in Illustrator! Although this was quite a long tutorial, nosotros've just scratched the surface of what Illustrator can practice, and then if you lot desire to learn more, make sure to check out our other Illustrator tutorials!


Discover More Illustrator Tutorials
Beginning drawing using Illustrator and cheque out these other cool Illustrator tutorials:

Source: https://design.tutsplus.com/tutorials/how-to-draw-in-illustrator--cms-39490
Posted by: mayoincents1958.blogspot.com
0 Response to "How To Draw An Image Im Illustrator"
Post a Comment